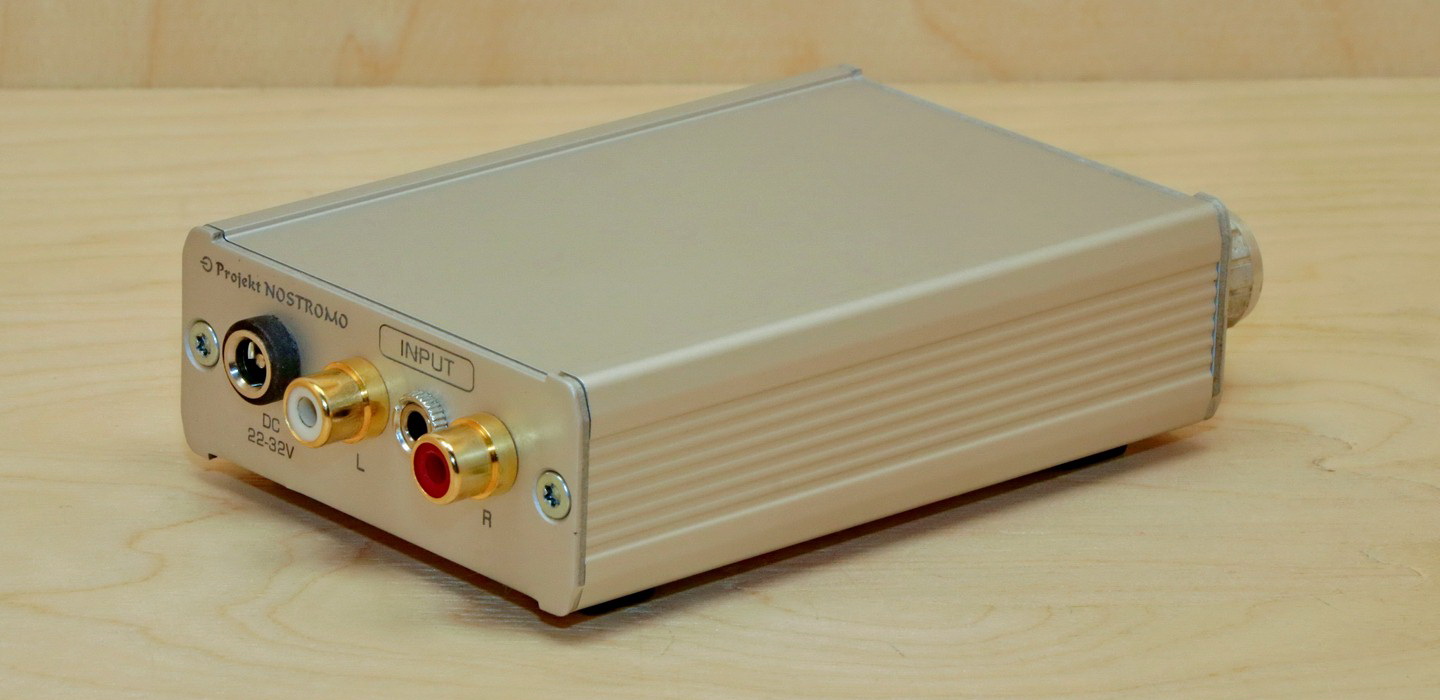
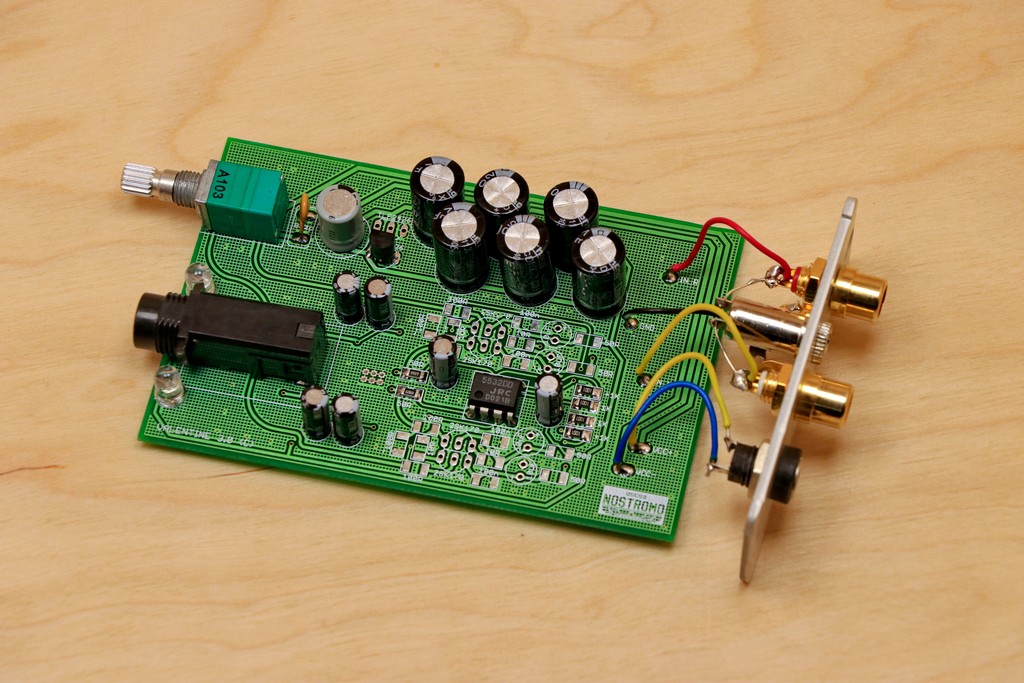
Nostromo Valentine is a small-sized headphone amplifier of Polish production. This is the first Projekt Nostromo company product I have dealt with. Products of Projekt Nostromo company have a good reputation and when one of my friends suggested that he would send me his headphone amplifier, to check if I can improve its sound, I was very enthusiastic, because people who had the opportunity to listen to Nostromo Valentine, express themselves about this headphone amplifier very positively.
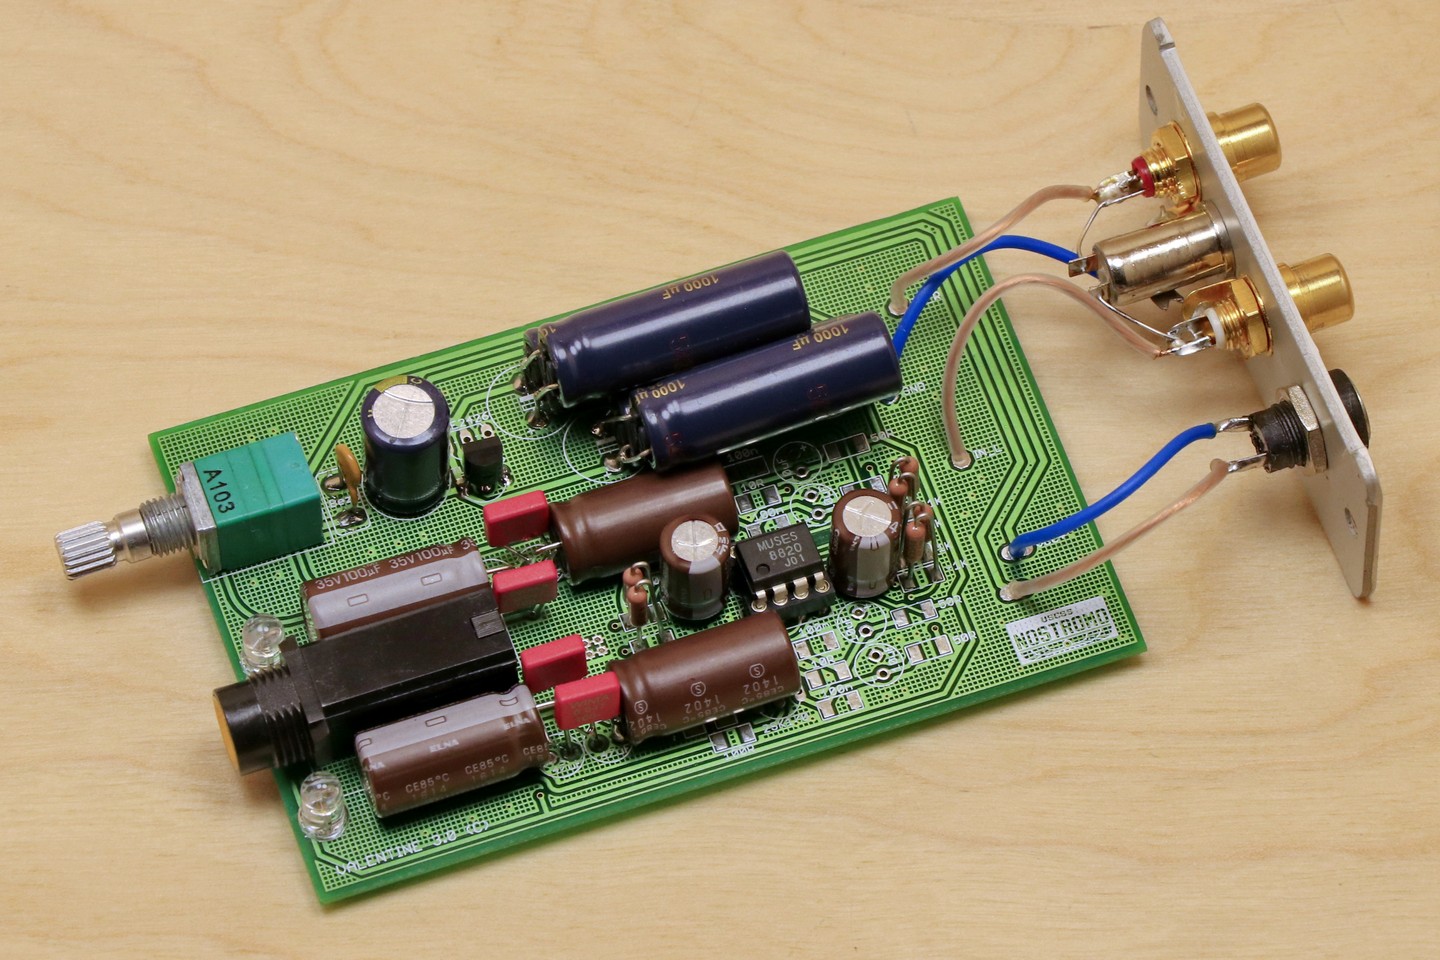
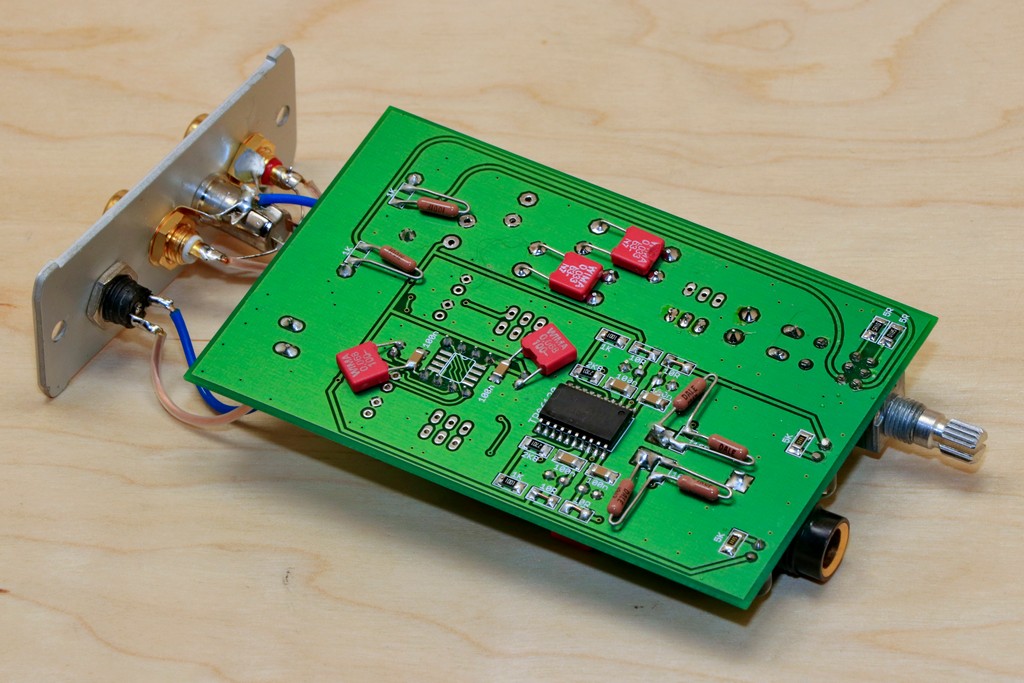
Nostromo Valentine is a cheap design and I did not expect much from this amplifier, but I was hoping that with such positive users feedback, the amplifier would offer something more than what its price would suggest. Before the first listening session, I decided to look inside the amplifier. The design of the Nostromo Valentine is very modest and, to put it simply, consists of a potentiometer, an operational amplifier and a headphone amplifier integrated circuit. The implementation of opamp and headphone amplifier integrated circuits is very simple and minimally interferes with the input signal. Personally, I like simple solutions, because any interference in the signal always degrades it to some extent, although well-chosen filters can bring a lot of positive changes to the sound.
After assembling the amplifier, it was time for the first listening sessions and, unfortunately, quite a disappointment. The sound that I heard was withdrawn, uniform, even stripped of dynamics. There was nothing in this sound that could be considered a positive feature. At first I thought something was wrong with connections or signal source, but everything was fine. I have dealt with the TPA6120 chip and the NE5532 operational amplifier more than once and I have never come across a design that would castrate the sound so significantly, so I knew that in Nostromo Valentine is still a lot of options for improvement.
Operational amplifier modifications

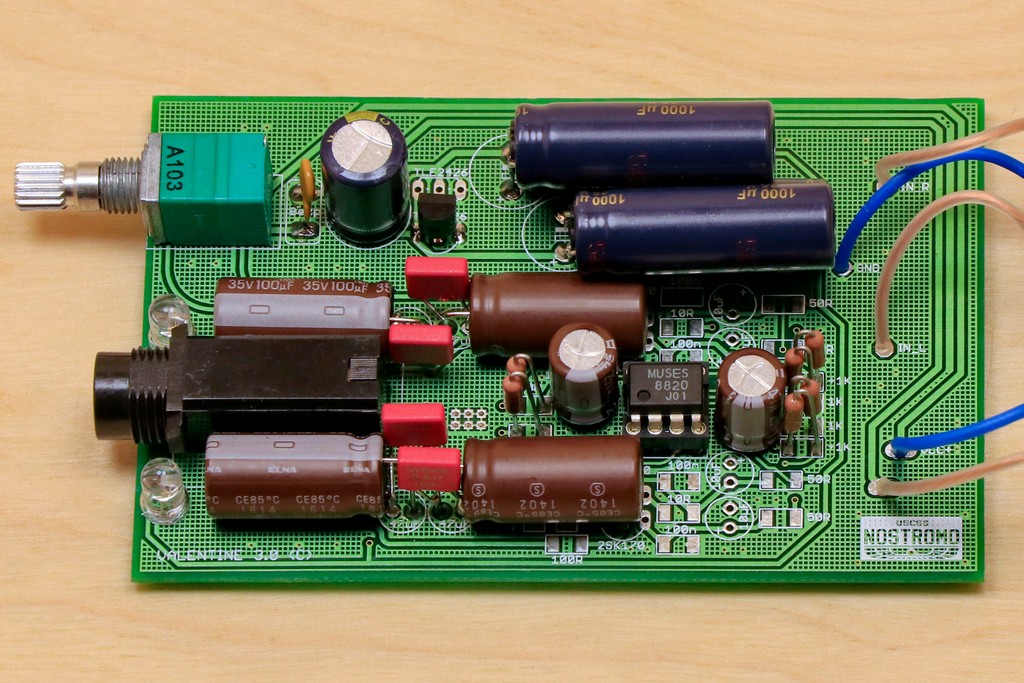
Nostromo Valentine uses a very simple implementation of an operational amplifier, based on the popular NE5532 integrated circuit. Opamp does not have any sound tuning function, it only prepares the signal for the TPA6120 integrated circuit. I decided to install a socket for an operational amplifier so that it was possible to replace the integrated circuits, and thus change the sound of the amplifier. The default configuration and tuning I was done for my favorite MUSES 8820 chip. The changes after replacing the opamp were very positive and the sound improved in every aspect. I must admit that I myself was surprised how big the changes took place after the replacement of the opamp. It is possible that this is due to a simple implementation that does not limit the opamp in any way, or factory fitted JRC NE5532 chip, was simply poor quality specimen.
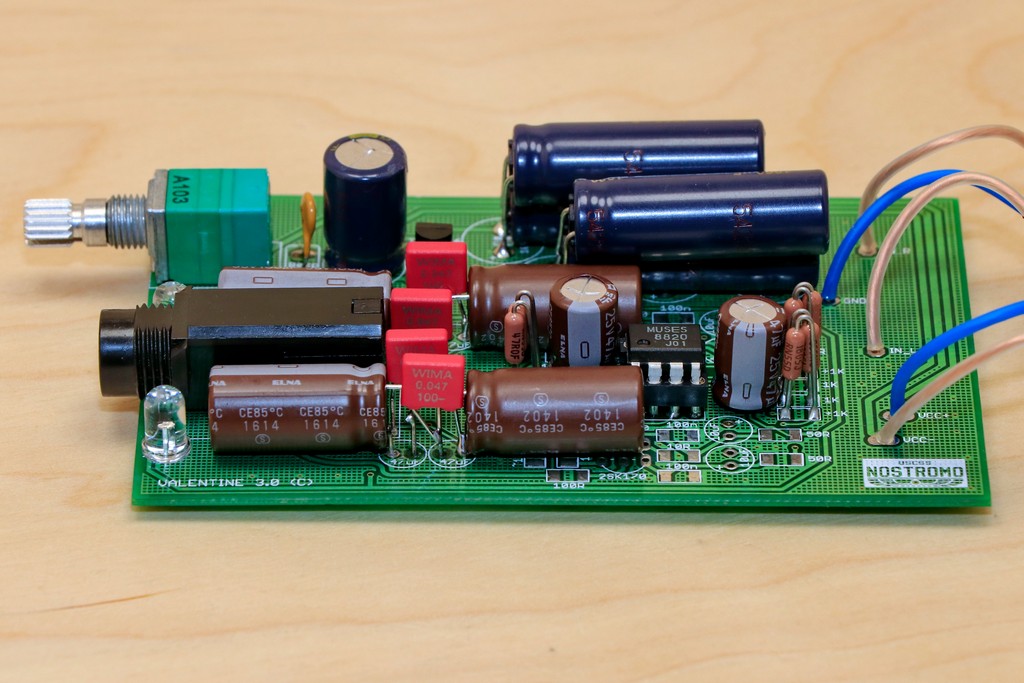
The next step was to picking electrolytic capacitors suitable for this implementation. In this case, the ELNA SILMIC II capacitors with a parameters of 47uF/35V proved to be the best solution. ELNA SILMIC II fits very well with the MUSES 8820 chip, providing a dynamic and clear presentation. MUSES 8820 has the opinion of an opamp that favors the lower and upper registers, but in combination with ELNA SILMIC II capacitors, is obtained a well-balanced and engaging sound.
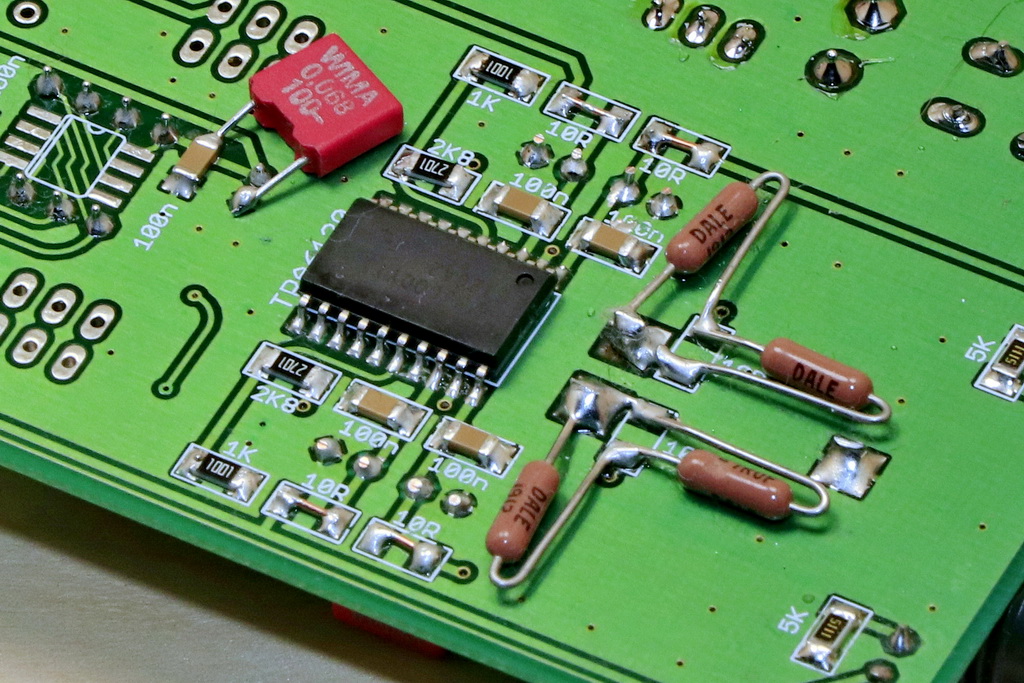
The next stage of the modification was the replacement of SMD resistors with Vishay DALE resistors. I used the RN55 version resistors because the larger RN60 did not fit between the housing and the bottom side of the PCB. The Vishay DALE resistors showed class as usual, adding better filling and an analog note to the sound. I have yet to come across an implementation where Vishay DALE would introduce any unwanted effects. There have been times when they have been able to soften the sound too much, but correcting this change is not a big problem. The action of Vishay DALE can be compared to a change in the weather, when we realize that the wind that we have been hearing all the time has finally died down and all the sounds that we were aware of begin, starts to reach us better thanks to the silence that has been created, but now they are fuller, more detailed, better placed in space.
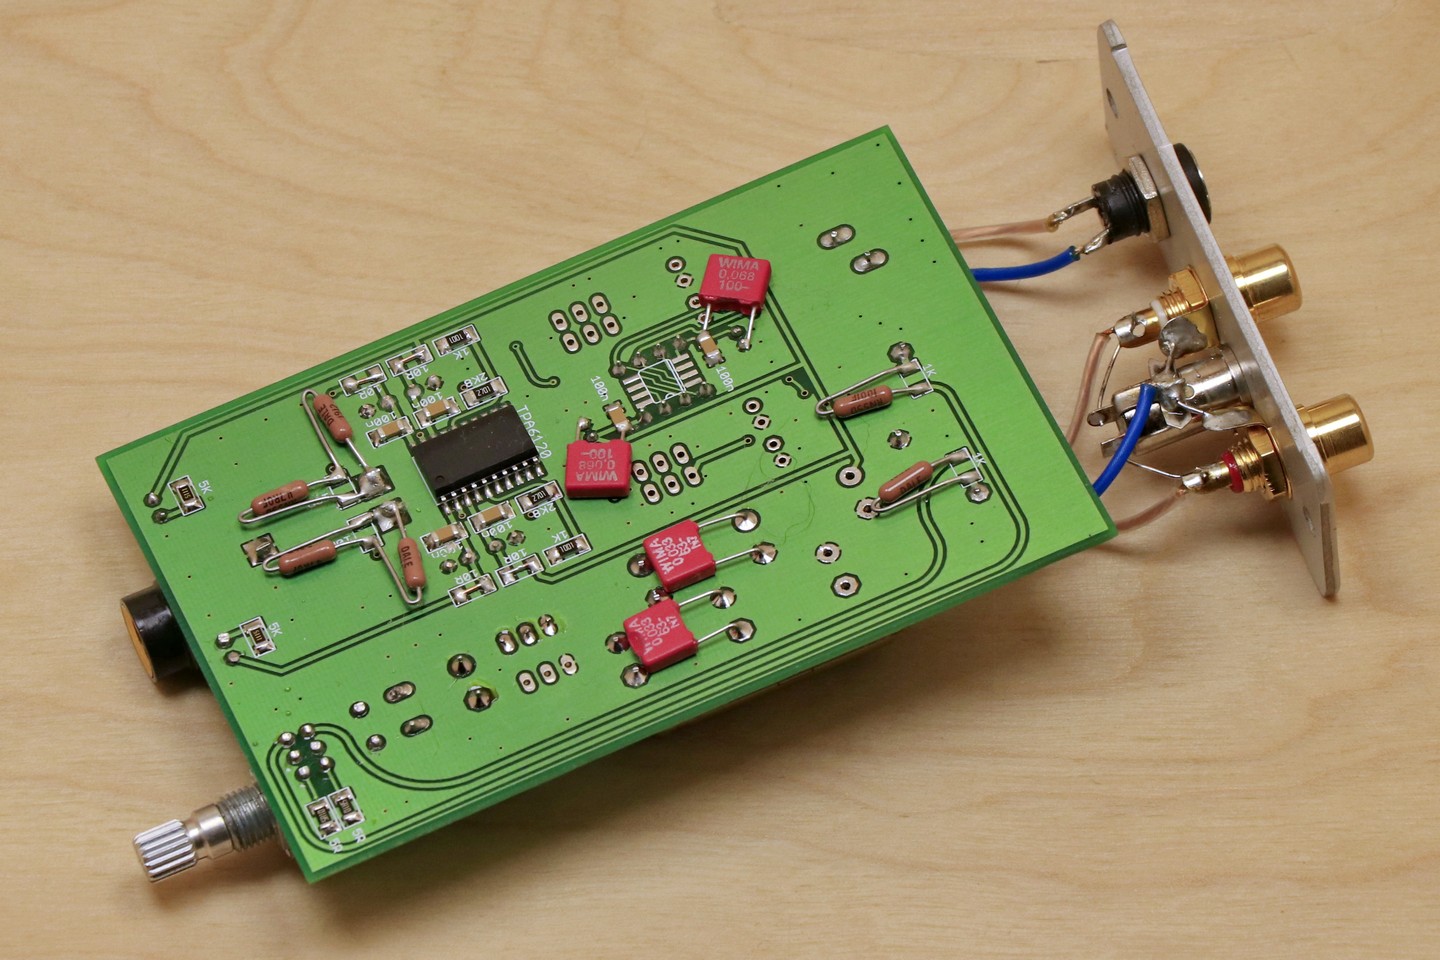
The last stage of work on the opamp section was the selection of the appropriate decoupling capacitors. The operational amplifier was equipped with 100nF SMD decoupling capacitors, but I decided to add foil capacitors for this set. As usual, I used my favorite WIMA MKS2 capacitors and in this implementation the 68nF capacitance proved the best, it provided better separation and transparency, and at the same time did not take away too much musicality from the sound.
TPA6120 headphone amplifier circuits modifications
The first changes that I decided to make for the TPA6120 chip were changes to the power supply. The power supply of the amplifier circuit chip consists of a 10 ohm resistor, a 33uF electrolytic capacitor and a 100nF decoupling capacitor.
The combination of a 10 ohm resistor and a 33uF capacitor is one of the TPA6120 tuning points. This solution is to calm down and soften the character of the amplifier, but I didn’t like it very much. I believe that power-generating elements, no matter what the values, whether they are milli watts or watts, should not have a limited power supply, because this causes sound deformation, and the level of these deformations depends on the load value.
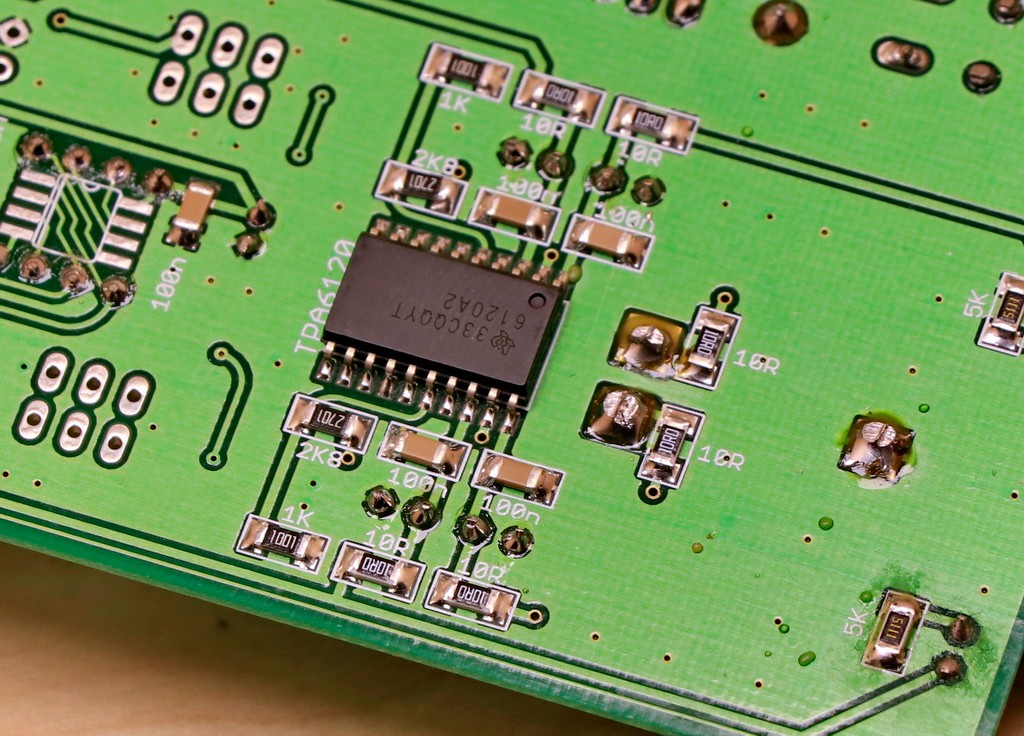
Therefore, I decided to remove the resistors from the power supply and replace them with a jumper. I also decided to increase the capacity of the electrolytic capacitors to 220uF, which is the highest possible value that could be contained in the housing. The effect was very positive, the amplifier started to sound completely different, the sound gained a lot of life and energy. Unfortunately, there were also negative effects in the form of considerable pushiness and lack of order. I expected such an effect and to correct the defects, I changed the value of the output resistors located between the TPA6120 chip and the headphone output from 10 ohms to 22 ohms.
Before I finally chose the value of the output resistors, I tested various values in the range of 10-47 ohms and the value of 22 ohms turned out to be the best solution, still providing great openness and dynamics, and at the same time eliminating the drawbacks resulting from removing the resistors from the power supply. Used resistors are of course the Vishay DALE in RN55 version. The photos show 4 resistors mounted on PCB. This is due to the fact that I didn’t have 22 ohms resistors in my collection in RN55 version, so I used two 47 ohm resistors connected in parallel, which gave a value of 23.5 ohms.
The next stage of the modification was the selection of the appropriate value of the electrolytic capacitors of the TPA6120 power supply. The capacitance of 220uF caused tonal balance disturbance and too high level of lower registers. The bass was not deformed or dominant and I suspect that many people would like it, but I tried to achieve the best possible balance of the sound. Before I choosed appropriate capacitors, I tested ELNA SILMIC II and Nichicon FineGold capacitors with capacities in 47-220uF range. Nichicon FineGold capacitors offered a calmer, more balanced sound. However, in the end, I chose ELNA SILMIC II capacitors with 100uF capacitance, which provide more energy, openness and a sense of communing with music compared to Nichicon FineGold capacitors. I recommend testing different variants of capacitors, because a lot depends on the design of the headphones and the preferences of the listener, but even with open headphones, the 100uF capacity ensures a sufficient number of lower registers. For closed headphones, even 47uF capacity can be enough.
The last stage of changes was the selection of appropriate decoupling capacitors. In this case, WIMA MKS2 capacitors with a capacity of 47nF proved to be the best. The 47nF capacitance added more air and widened the stage, but at the same time did not take away the plasticity of the sound, which is sometimes the case when the decoupling capacitors have too high capacitance.
Amplifier power supply modifications
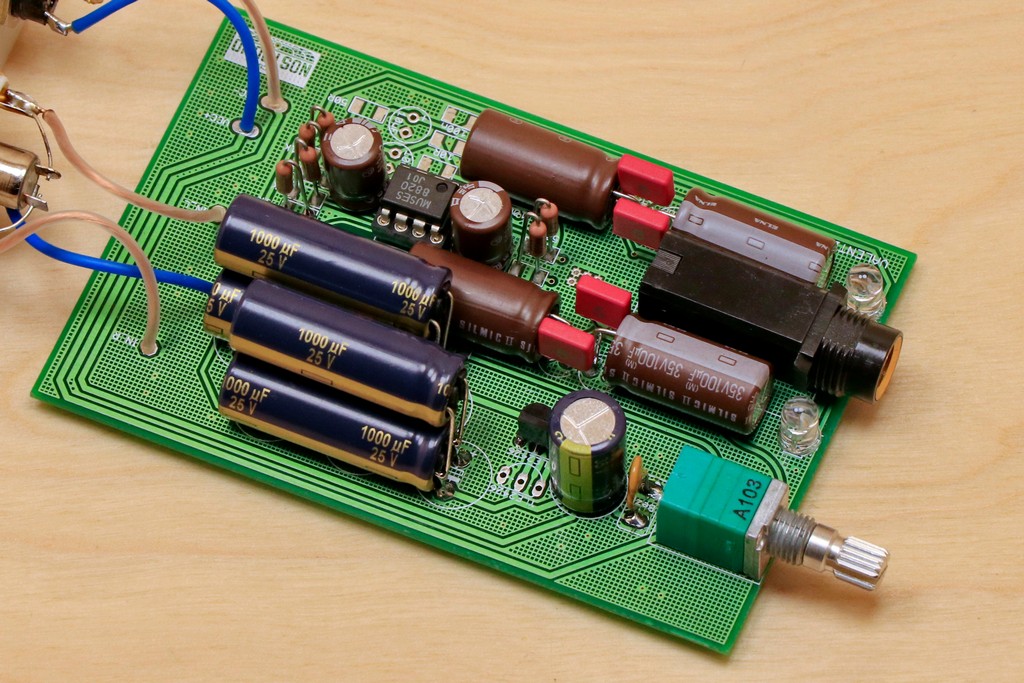
This will be a very short description, because Nostromo Valentine has been designed so that the input of the amplifier is supplied with already prepared, good quality power supply. In the housing of the amplifier itself there is only a battery of electrolytic capacitors 6x 1000uF/25V. I had a dilemma with these capacitors, because used capacitors were small and nothing bigger could fit into the housing. All the high-quality capacitors I use have much larger dimensions than the Chong capacitors used. It turned out that the only possible solution is to use Panasonic FC capacitors, which have dimensions that allow to fit four 1000uF/25V capacitors in the housing in the lying position. I used the remaining mounting places to mount additional WIMA MKS2 decoupling capacitors with a capacity of 33nF. I believe that the filtering properties of the capacitors are more important in this case than the summary capacitance itself, and the known character of the Panasonic FC, which provided a good basis for other changes. There is one more capacitor next to the potentiometer with parameters 47uF/63V. I replaced this capacitor with a Panasonic FC 330uF/35V. The permissible voltage of this capacitor is a bit too low for the maximum permissible supply voltage of the amplifier, which is 32V. However, in the case of a 24V power supply, it is a sufficient value, and this is the voltage of the power supply unit, which I have received with the amplifier, so I decided to use a capacitor with a higher capacity and a voltage of 35V.
Nostromo power supply unit
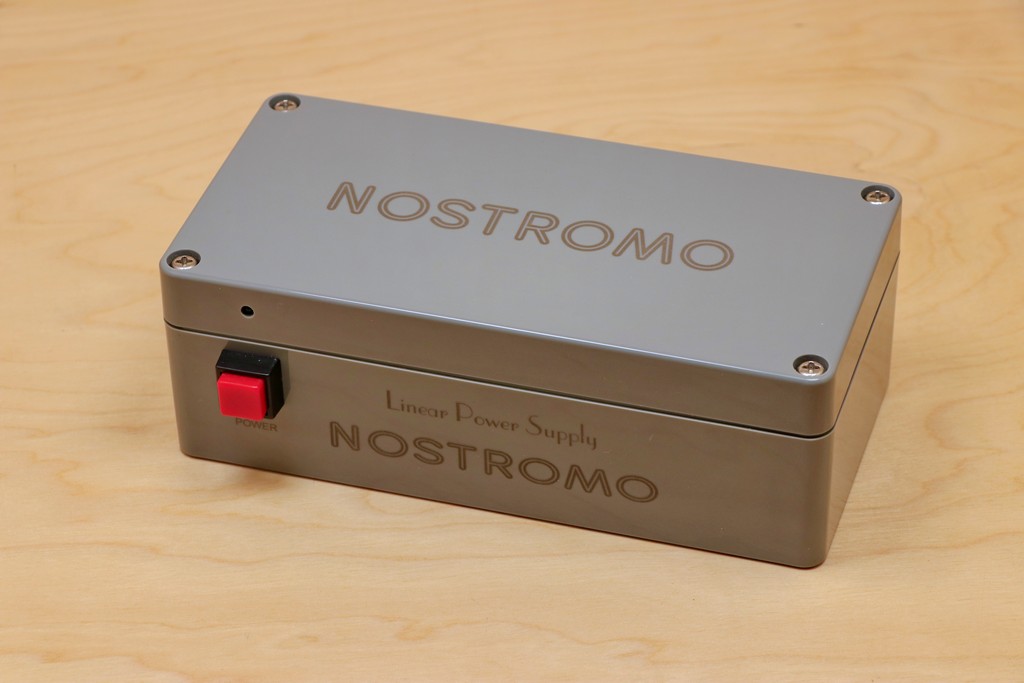
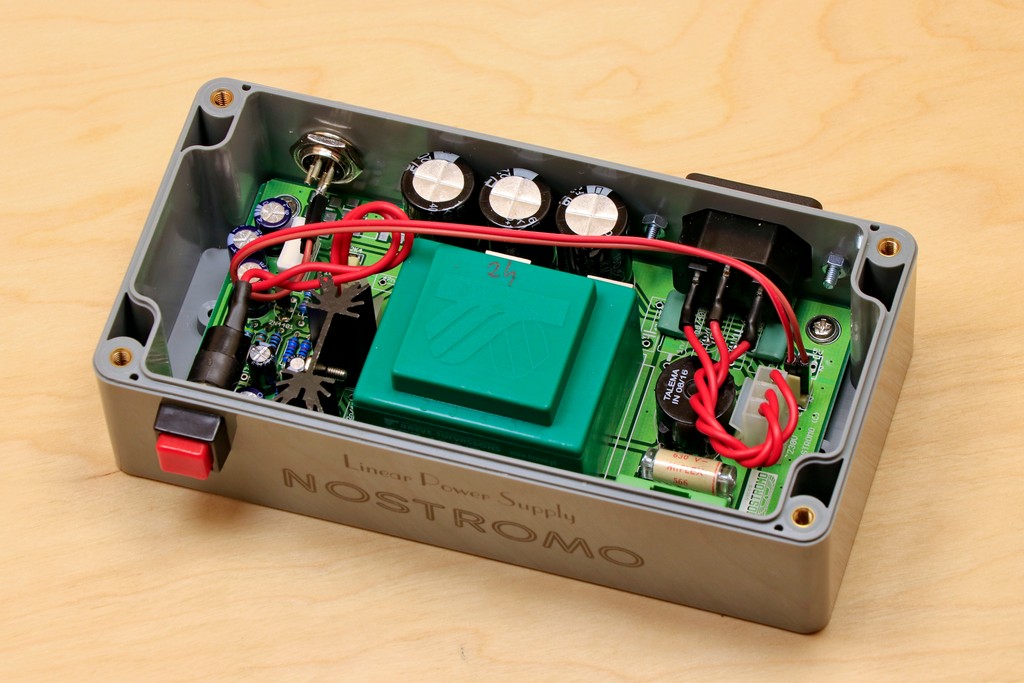
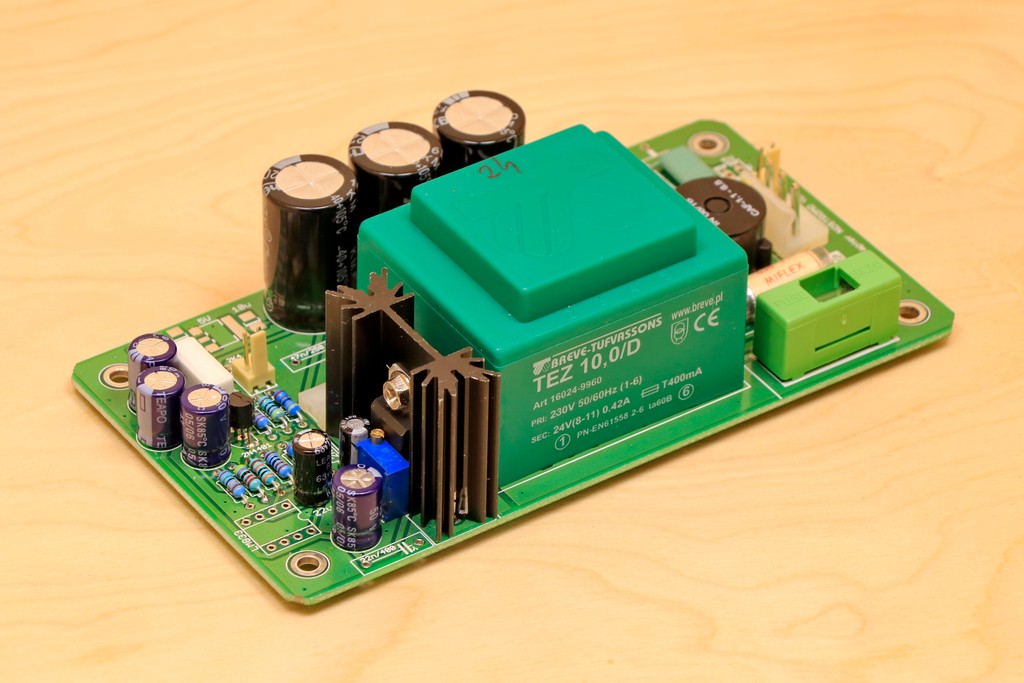
The Nostromo Valentine amplifier has such small dimensions due to the fact that the whole task of providing good quality power rests on the external power supply. Together with the amplifier I received a dedicated Nostromo linear power supply. I also planned to change this power supply to improve the quality of the power supply, but I gave up on this plan. The reason was too many design flaws that made any changes pointless. The elements used themselves are not the worst quality, but their arrangement is completely incomprehensible. The mains supply section is not separated at all and the mains circuits are intertwined with the output voltage circuits in many places of the construction.
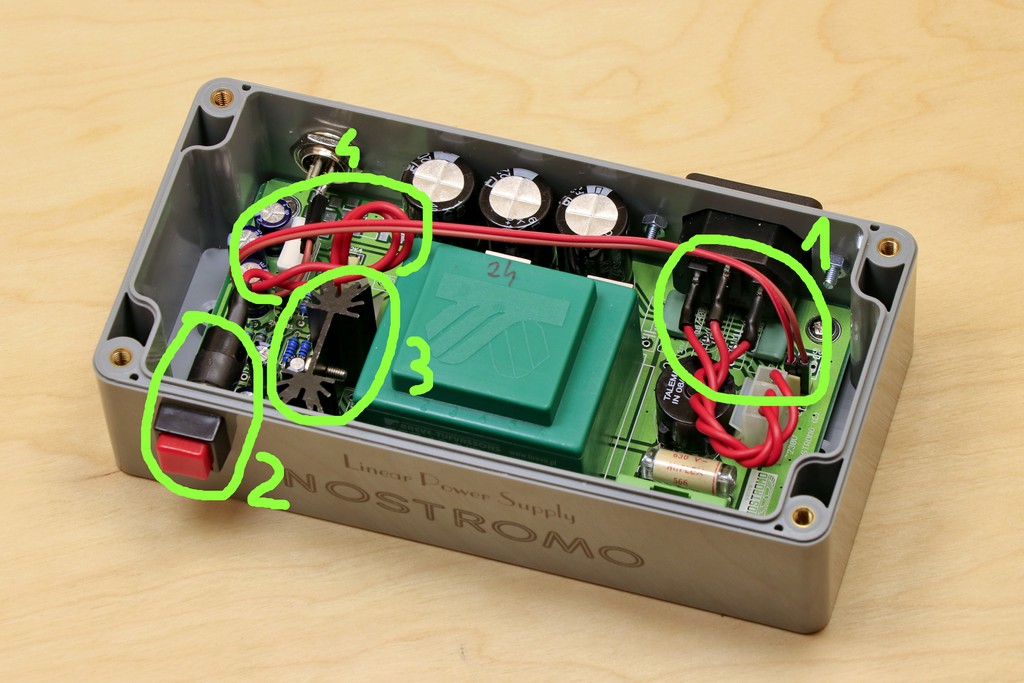
Below are described my observations regarding the design of the power supply.
-
The place on the PCB where mains power supply socket is located and at the same time the point from which the output voltage comes out from PCB. The wire that carries the output voltage to the output socket is located very close to the mains power supply socket wires. I do not understand why the output voltage is transferred to the other side of the PCB and then returned to the output socket with a wire.
-
The power switch to which the mains power is applied is located on the other side of the housing, in relation to the mains socket, so that the mains voltage unnecessarily passes through half of the PCB. Why was the mains power switch placed in such a place? It could be placed close to mains power input, there is enough space above the fuse.
-
The power regulator chip is screwed to the heat sink, without an insulating pad. This makes the heat sink act as an antenna and collects noise from the wires from the mains power switch located nearby.
-
Another point where the cable connected to the output socket is close to the mains cables, this time from the power switch.
This design makes the mains noise propagate throughout the power supply. Which limits the effectiveness of the applied mains filter. In order to confirm my observations, I decided to check what changes will occur when the amplifier is powered from a 24V battery. My assumptions were confirmed because the changes were well audible. Better space, control, treble quality, better consistency and precision, overall more mature sound. Of course, there are no power supplies that can completely eliminate mains interference. But from my experience creating power supplies, I know that you can make a power supply that is not much different from a battery. In the case of the Nostromo Valentine amplifier power supply, it would be enough to make a few design changes to separate the mains circuit from the rest of the power supply.
Summary
Summarizing the end result, I usually try to describe the changes introduced by my work in relation to what the device presented before the modifications. However, in this case the changes were so huge that it’s hard to relate to what was before changes. In the amplifier, literally everything has changed. Nostromo Valentine now plays like 3-4 times more expensive constructions. The current sound is very dynamic, varied and colorful. There is a lot of air in it and a noticeable atmosphere and dimensions of the stage. The bass is varied with well-marked contours, it has quite a warm sound, but well-balanced and it can handle even fast songs without any problems, the middle range is very transparent with a lot of air and no sibilants. The upper range does not lag behind, the treble does not irritate and is nicely finished.
The sound obtained can be even improved if you replace the power supply with a better one. A better power supply makes the sound even more mature, especially in the upper and lower registers, where precision and control are improved.
Below I present the impressions of the amplifier owner after the first listening sessions, because this is probably the best possible summary.
This is it! Today I was very anxious because I was afraid of what I will hear …
At first I turned on Adele’s “Hello”, a few seconds and my jaw dropped, then a smile appeared from ear to ear. The bass is so incredibly springy now, there is a bit more of it, but it’s the WORLD CHAMPIONSHIP! Plus, it has many levels! How is this possible…? Moments later I turned on “Judith” A Perfect Circle and got goosebumps when Maynard started to howl. Now I turned on a mechanically playing Fear Factory band and the track “Replica”, which on the old construction was dry and cold, suddenly became PERFECT, with finally surprising bass present, I can hear the bass working, the chirping of drum cymbals and this air !!! The dynamics has jumped a few levels higher because I can hear everything in this confusion! Another dry album “Transgression” and “Mechanize” and I can’t believe what I hear … There is no colorless playing here anymore and I can catch individual tastes from the wall of sounds! The midrange seems to have slightly moved backwards, or it is simply warmer, because what I hear is no longer tiring! And now what I feared the most, i.e. the treble. They do not spark, there is no sibilants, slightly rounded, but this does not prevent the appearance of greater holography and space compared to what was before. I’m shocked how musical it is! The tracks I know are surprising every few seconds because there are sounds which was running away or I simply didn’t hear them before. What you did with this “box” is a masterpiece … I did not expect such a sound in the most daring imaginations. From one of the cheapest amplifiers (praised here and there) you have made a sensational-sounding device. The amount of air, compared to what it used to be, is much greater. Thanks to this dynamic, you can fall into a trance … What you wrote about him, that “there is more of everything”, is the shortest possible description. The stereophony and the depth of the stage have improved, the sound is more resolving. I quickly jumps through different genres of music and literally nothing sounds dry or bad anymore.